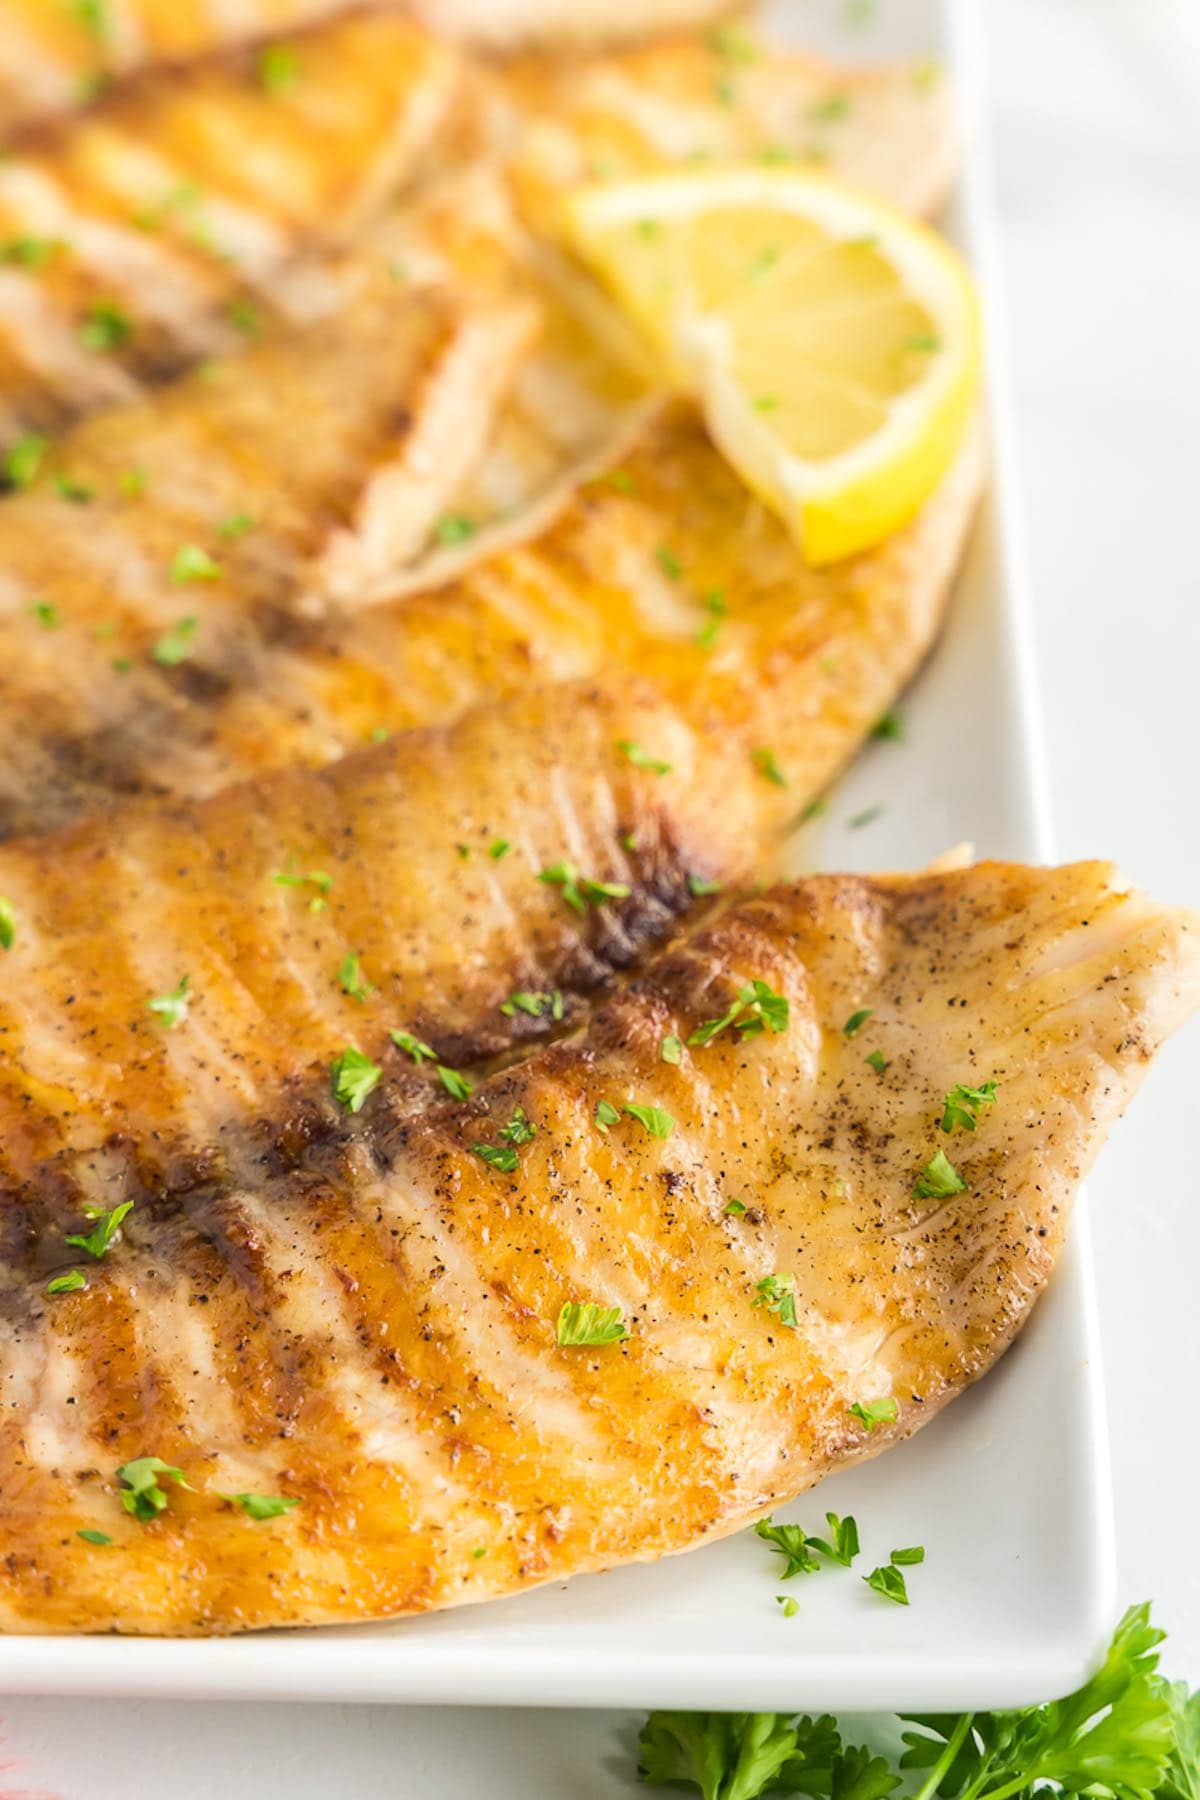
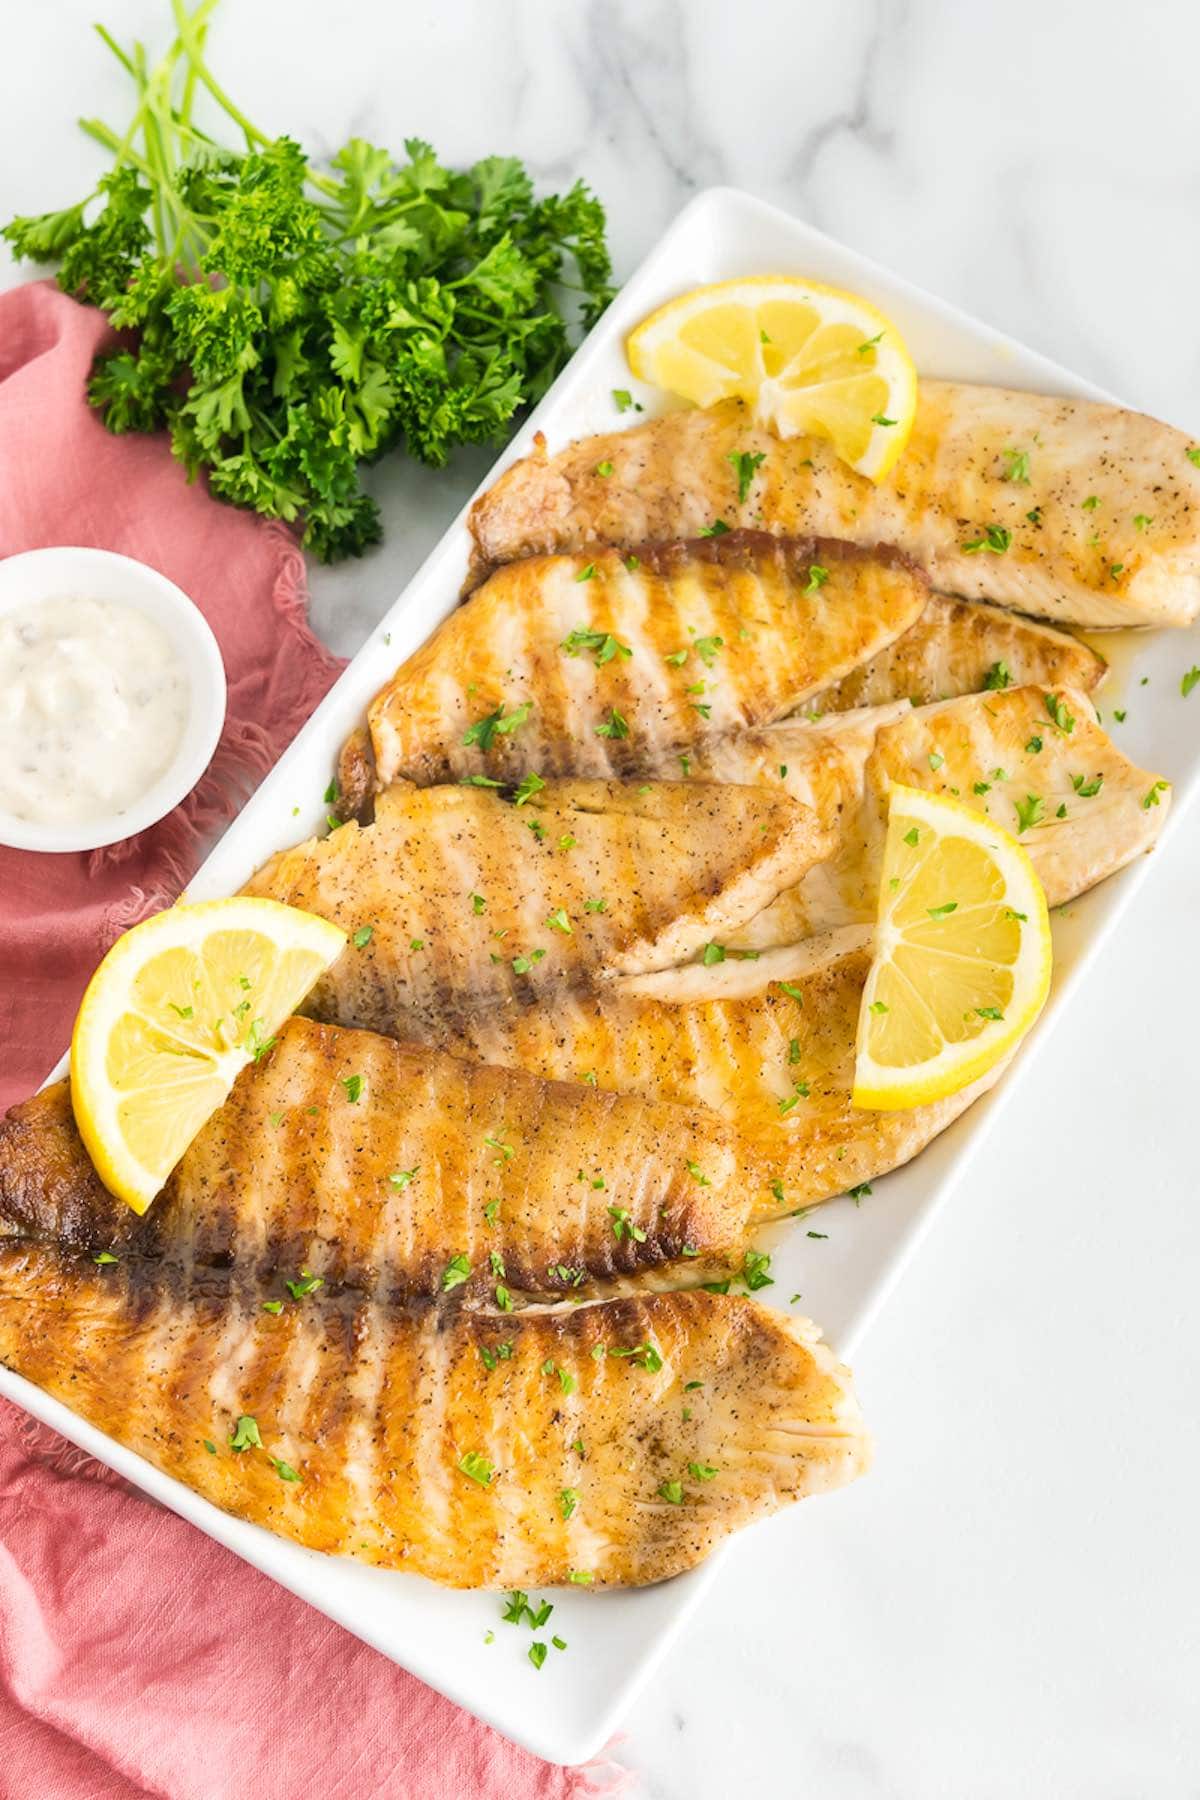
Posted on

Teriyaki Steak Bites with Peanut Butter Slaw!

Teriyaki Steak Bites with Peanut Butter Slaw!

Tools Needed:

  • Cast Iron Skillet

  • Bullet Blender

Steak Ingredients

  • 1 lb (454g) Sirloin Steak, cubed

  • Salt & Pepper, Garlic Powder (Optional)

Sauce (optionally go with pre-made sugar free teriyaki sauce)

  • 2 tbsp (14g) Sweetener, Preferably Brown (no stevia!!)

  • 1/4 tsp garlic powder

  • 3 tbsp (42 ml) Soy Sauce

  • 1 tbsp (15 ml) Rice Vinegar

  • 1 tbsp (15 ml) Fish Sauce

  • 1/4-1/3 cup (50-75 ml) Chicken Broth

  • 1/4 tsp xanthan gum (essential for thickening)

Slaw

  • 50g white cabbage

  • 50g red cabbage

  • 25g shredded carrots

  • 10g onion (optional)

Peanut Butter Dressing

  • 1 tbsp (6g) Powdered Peanut Butter

  • 1-1.5 tsp brown sweetener (no stevia!)

  • 3 tsp rice or apple cider vinegar

  • 1 tsp sesame oil

  • 1/8 tsp ground ginger

  • 1/8 tsp garlic powder

  • 1/8 tsp salt

Instrucciones!

Slaw (make this first!)

  1. Chop Up and mix vegetables in a medium-large bowl

  2. In a smaller bowl, whisk together your peanut dressing ingredients

  3. Combine slaw and dressing, then refrigerate

“Teriyaki” Sauce

  1. Warm your chicken broth

  2. Add all ingredients into a bullet blender, adding liquids first, then dry powders, then blend until smooth. Some bits and pieces (namely the xanthan gum and sweetener) may clump together at the bottom of the cup. Just take a spoon and scrape them up back into the mixture and reblend until completely smooth. Add more water or broth to the mixture if too thick.

  3. Set aside when finished. Do not refrigerate.

Steak

  1. Let steak sit out and come to room temperature. Ideally set out your steak before making the slaw.

  2. Once ready to cook, pat steak dry and season with salt, pepper& garlic. Let steak sit another 30 minutes.

  3. Cut steak into bite size pieces

  4. Heat olive oil or tallow in cast iron skillet on high heat

  5. Add steak bites to skillet once it starts to smoke. Sear bites on one side for 1 to 1.5 minutes, then flip and sear on the other side for the same time, and make sure to sear any fat caps too. Remove steak from pan once sides are seared and let rest in a seperate dish, deep enough to collect any juices. Your steak should be around 125°F internal temperature. Depending on how much steak you have you will want to do this in batches, I did it in 3.

  6. ⁠Once all bites are seared off, remove skillet from heat for about 5 minutes to cool it down a bit, then add your teriyaki sauce mixing it with the oil/juices in the pan. Turn the heat back on to low in order to heat the sauce.

  7. Add your steak bites and resting juices back into the pan and coat with sauce. At this point you will have medium rare to medium steak bites that are buttery and tender!

This recipe makes either 2 dinner sized servings or one OMAD serving.

Nutrition (1 dinner sized serving. If doing OMAD, double these figures! )

Steak with Sauce

  • 490 kcal

  • 2g net carbs

  • 52g protein

  • 32g fat

Peanut Butter Slaw (with optional onions)

  • 58 kcal

  • 5g net carbs

  • 2.5g Protein

  • 2.8g fat

Total Kcal Per Serving – 548 kcal.

Published at Tue, 24 Jan 2023 20:28:38 +0000

r/ketorecipes

Posted on

How to Make Pork Cheeks

How to Make Pork Cheeks

If you are wondering how to make pork cheeks, I have the BEST recipe for you!

Pork cheeks are tender and oh so delicious!

We did a special add on with our Butcherbox subscription of Pork Cheeks. I honestly have never had pork cheeks before this but they are delicious IF you cook them right! So I got in the kitchen and started writing a perfect keto recipe on making pork cheeks!

GREAT news!

You know I love getting my food delivered so I can spend more time doing things I enjoy rather than going to the store; that’s why I get Butcherbox mailed to my front door!

If you’re an existing ButcherBox member I’ve got deals for you too.

Skip the stores with all the temptations and get quality food mailed to your front door!

Click HERE to access member deals and specials. You’ll find exclusive and limited time offers as well as new product launches like lobster, ground bison, seafood sampler, cast-iron favorites, their legendary bacon blast (10 packs of bacon for just $5/pack), and so much more. Their member deals are constantly changing so be sure to click HERE!

Slow cooking pork cheeks ensures the cheeks aren’t tough and gives the fat time to render out, making them melt-in-your-mouth tender.

If you want to watch us make these delicious Pork Cheeks, subscribe to our new YouTube Channel to get updated when the video comes out which will be in a day or two, and comment below on what video recipe we should make next!

How to Make Pork Cheeks

Prep time

Cook time

Total time

Author:

  1. Preheat the oven to 320 degrees F (160°C).
  2. Trim the cheeks of any sinew and season on all sides with salt.
  3. Heat a tablespoon of lard, tallow or duck fat in a large Dutch Oven over medium high heat. Once hot sear the pork cheeks on one side for 2 minutes, flip and cook another minute or until slight golden brown.
  4. Remove the browned cheeks while leaving the drippings. Add the onion and garlic in the Dutch oven and cook over medium heat for 5 minutes. Return the cheeks to the Dutch oven. Add a handful of fresh thyme, bay leaves and pepper.
  5. Pour in bone broth to cover the cheeks, put the lid on and slow cook in the oven for 2–3 hours, or until the cheeks are very tender and almost falling apart.
  6. Remove the bay leaves. Serve with sauce from the Dutch oven. Store extras in an airtight container in the fridge for up to 4 days. To reheat, place the cheeks and sauce into a casserole dish and bake in the oven at 300 degrees F for 7 minutes or until heated through.

Nutritional Information:
649 calories, 64g fat, 10g protein, 4g carbs, 1g fiber

3.4.3177

Doesn’t Carole look AMAZING??? She lost 90 pounds!

“Thank you Maria Emmerich! 

I lost 90 pounds! 

I am turning 63 this month and I feel better than ever!

If I can do it, anyone can!” Carole 

Most people I consult are doing keto totally wrong. Get fast results with the my Mind-blowing Keto School!

Click HERE to check out my supplement plans!

Published at Fri, 27 Jan 2023 09:47:14 +0000

Carnivore

Posted on

Grilled Tilapia

Grilled Tilapia

Grilled tilapia is a fast and fresh dinner you can have on the table in 10 minutes or less! The delicate fillets are simply seasoned and seared over a hot grill. It’s the perfect lean protein to pair with any side!

grilled tilapia.

Even if you aren’t the world’s biggest fish and seafood fan, you’ll still love this grilled tilapia recipe. It’s quick, easy, and a great way to make the most of an affordable, “non-fishy” white fish. In the end, you’ll have a lean and flaky protein that you can pair with almost any side dish!

What is tilapia?

Tilapia is a freshwater fish native to Africa but it’s also the most farm-raised fish in the world. In the U.S., tilapia is the fourth most consumed fish, following tuna, salmon, and Alaskan pollock. This is likely because it’s affordable, easy to prepare, and mild-flavored.

Good-quality, fresh tilapia tastes most similar to red snapper and cod. It’s naturally sweet with soft buttery notes and doesn’t require many seasonings. Whether it’s grilled, pan-seared, baked, or air fried, tilapia cooks up to be firm and flaky with a soft and silky mouthfeel.

Why you’ll love this recipe

  • Quick and easy. The meaty tilapia filets are easy to cook on the grill and don’t fall apart! They’re ready to eat in less than 10 minutes. 
  • It’s very nutritious. Tilapia is naturally low in fat and calories, but rich in protein – one petite filet has over 20 grams of protein. It’s also a great source of essential vitamins and minerals, like vitamin B12, vitamin D, magnesium, and potassium. 
  • Flexible and budget-friendly. Tilapia is affordable and easy to find compared to other types of mild white fish. The seasonings in this recipe are simple, but feel free to jazz them up as you wish or serve this flexible fish next to any sides you love.

If you are anything like our family, we love cooking with tilapia because it’s very affordable, and we can find it at almost any grocery store! 

Ingredients needed

This list of ingredients is short and sweet. Here is what you’ll need:

  • Tilapia – The tilapia in most grocery stores in North America is farm-raised, thus making it readily available year-round. You can use frozen tilapia filets as a substitute, but make sure to thaw them in the fridge beforehand.
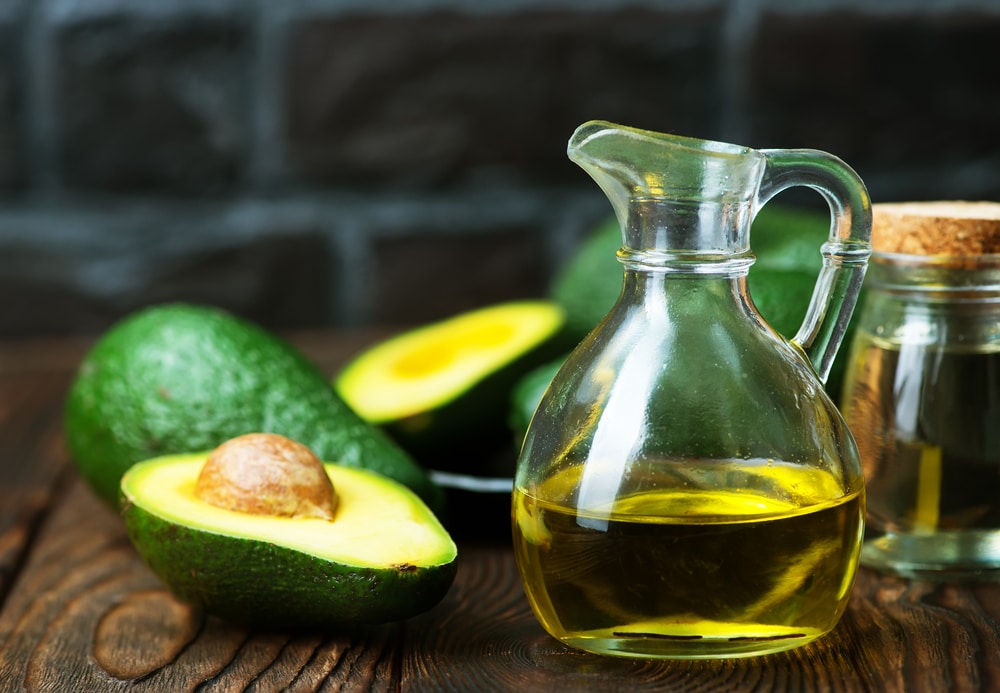
  • Olive oil – To coat the fish and prevent it from sticking to the grill grates. 
  • Salt and pepper – These are the only seasonings you need to accentuate the fish’s natural buttery flavors.
  • Lemons and parsley – For serving and to help brighten up the flavors. 

How to cook tilapia on the grill

Simple is the name of the game when grilling tilapia. Here’s how it’s done:

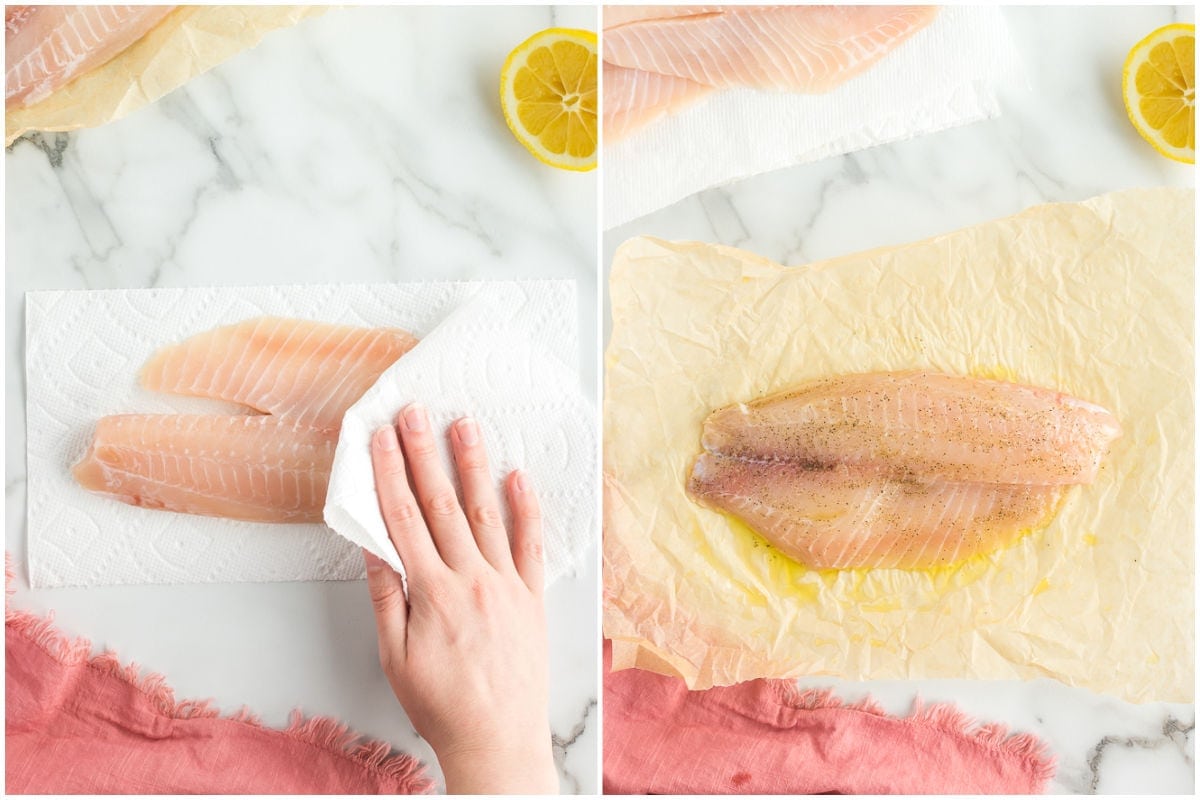
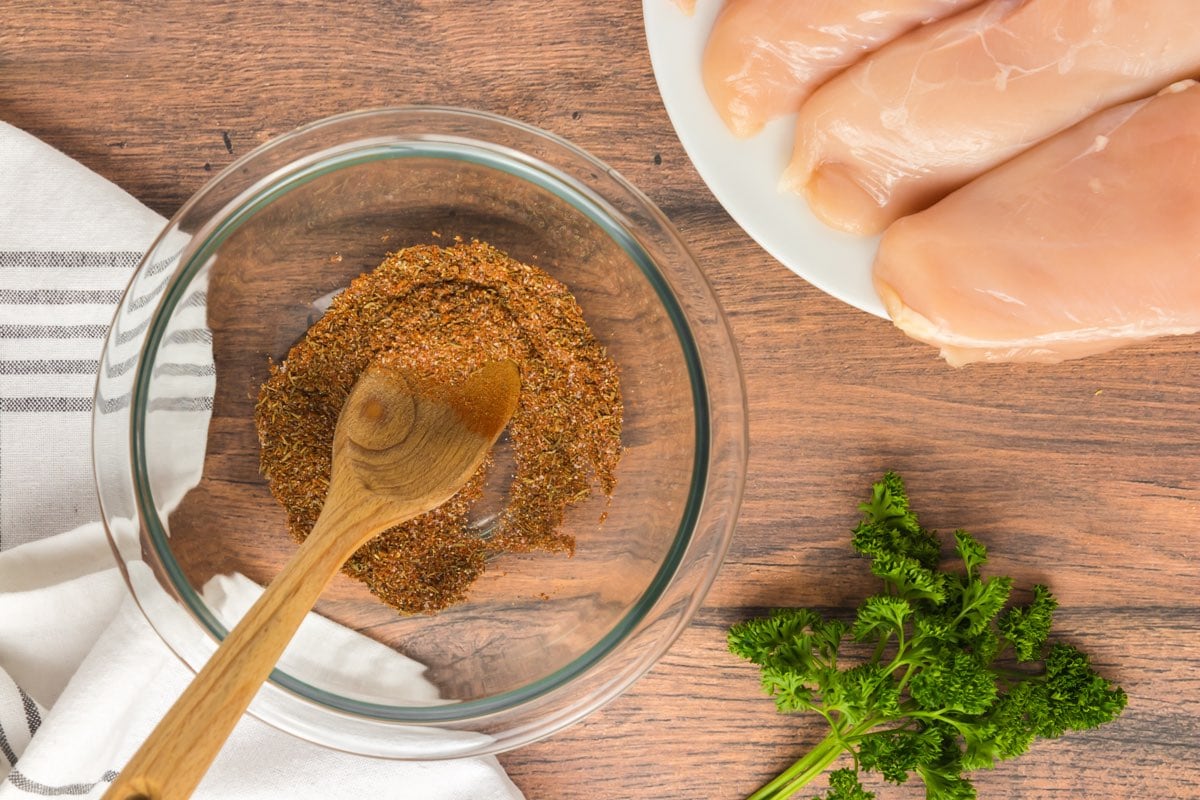
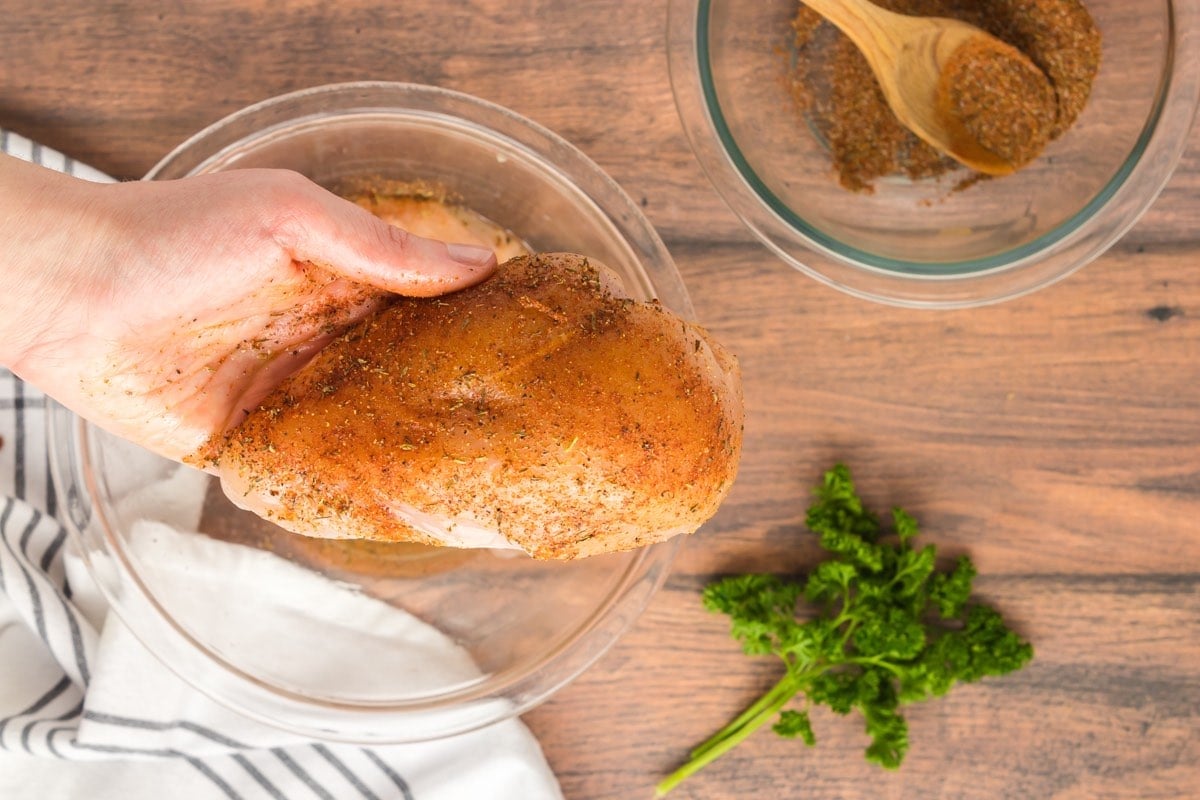
Step 1: Season the fish.

Pat the fish filets completely dry with a paper towel. Rub olive oil generously on both sides and season with salt and pepper. 

seasoned tilapia.

Step 2: Preheat the grill.

Preheat the grill to medium-high heat. Once hot, scrape the grates and brush them with olive oil.

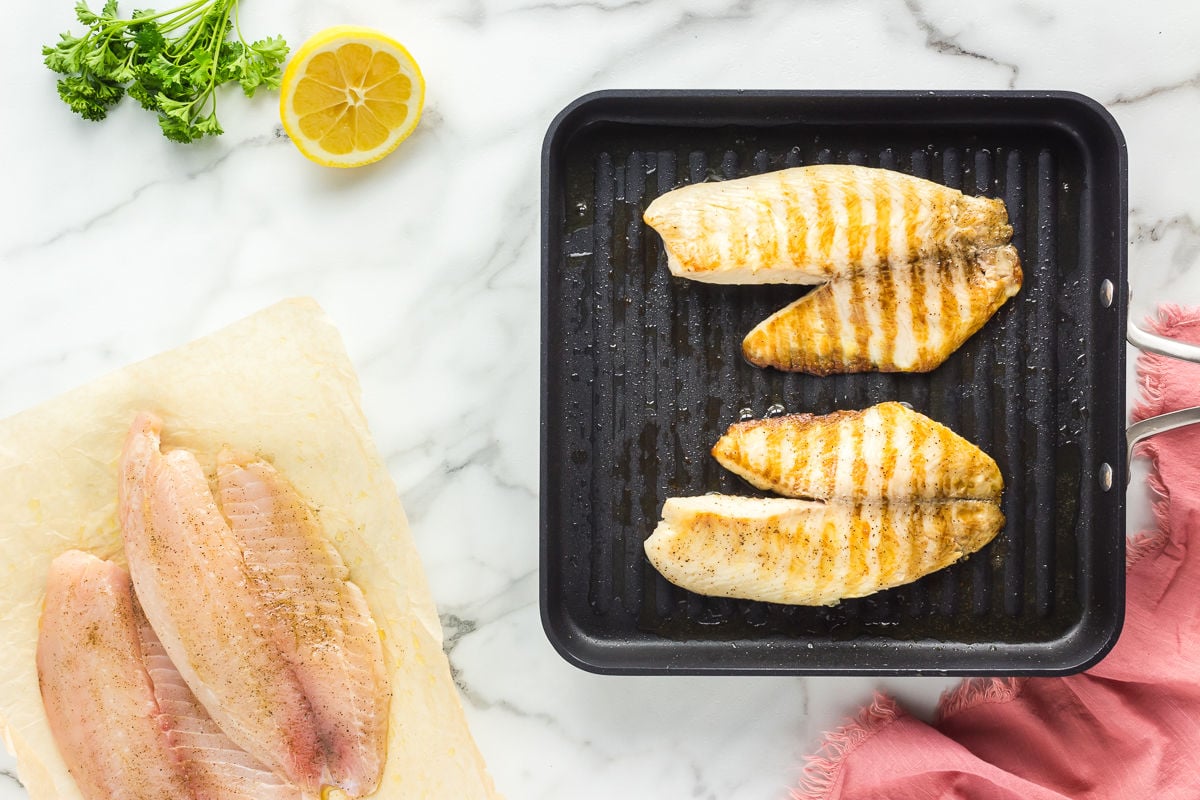
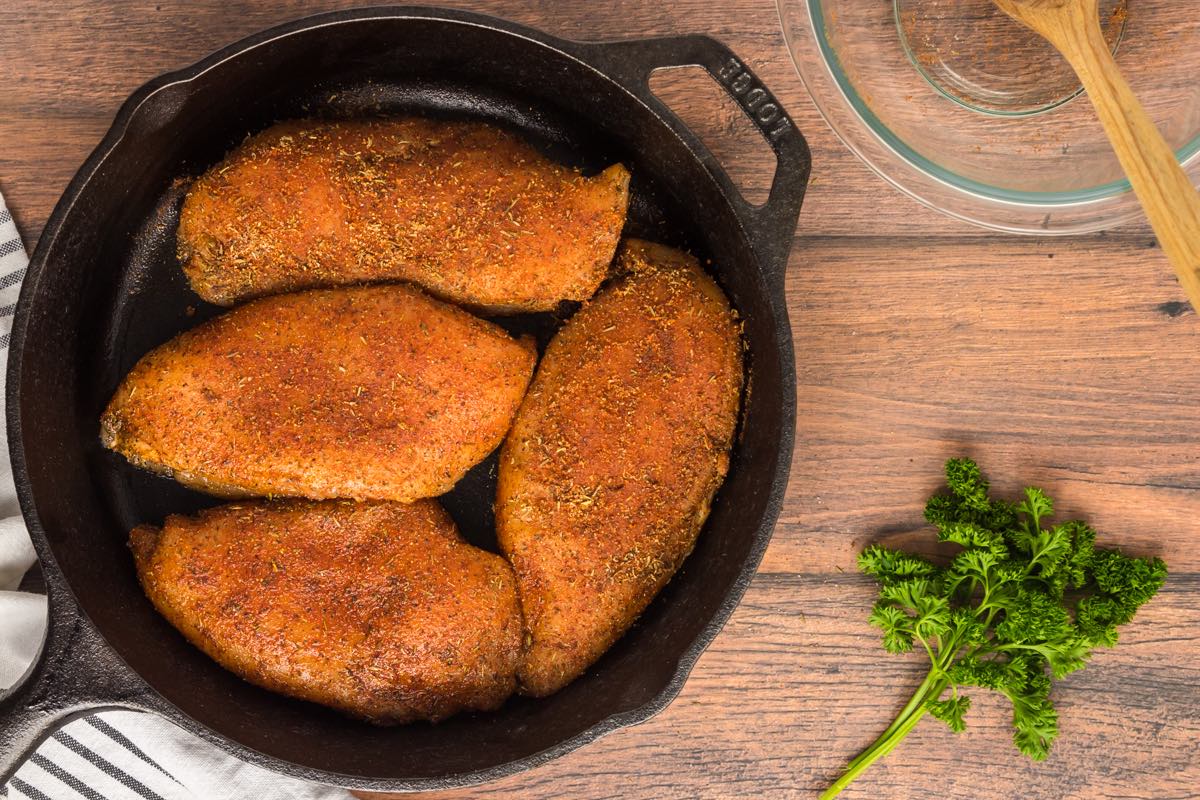
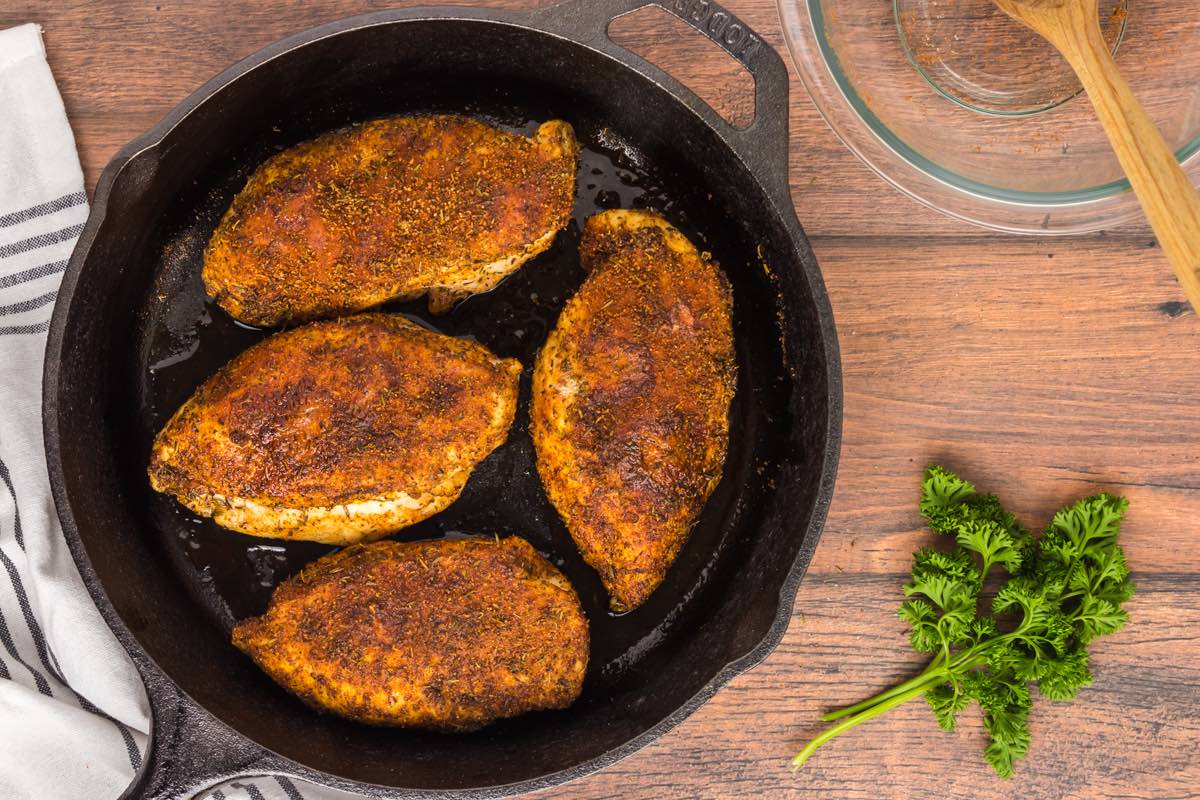
Step 3: Grill the tilapia.

Grill the tilapia filets until the sides begin to turn opaque. Flip to the opposite side and cook until both sides are fully opaque. 
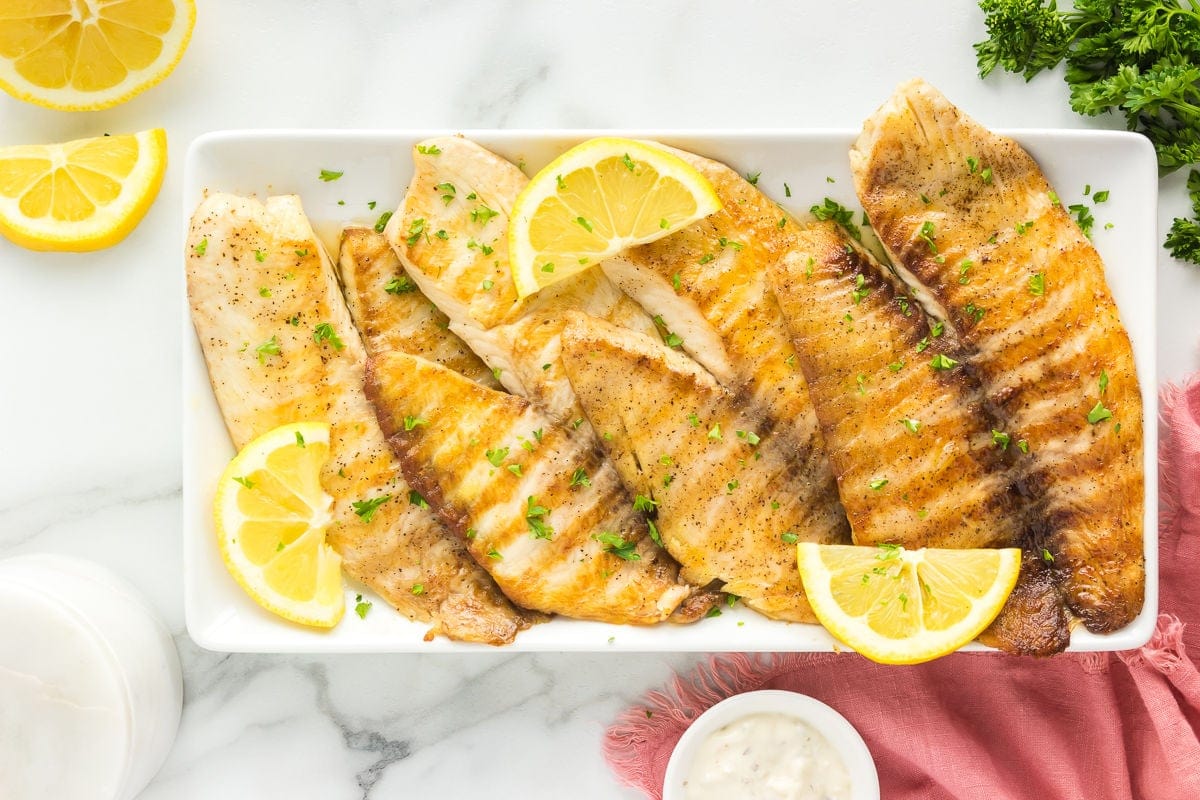
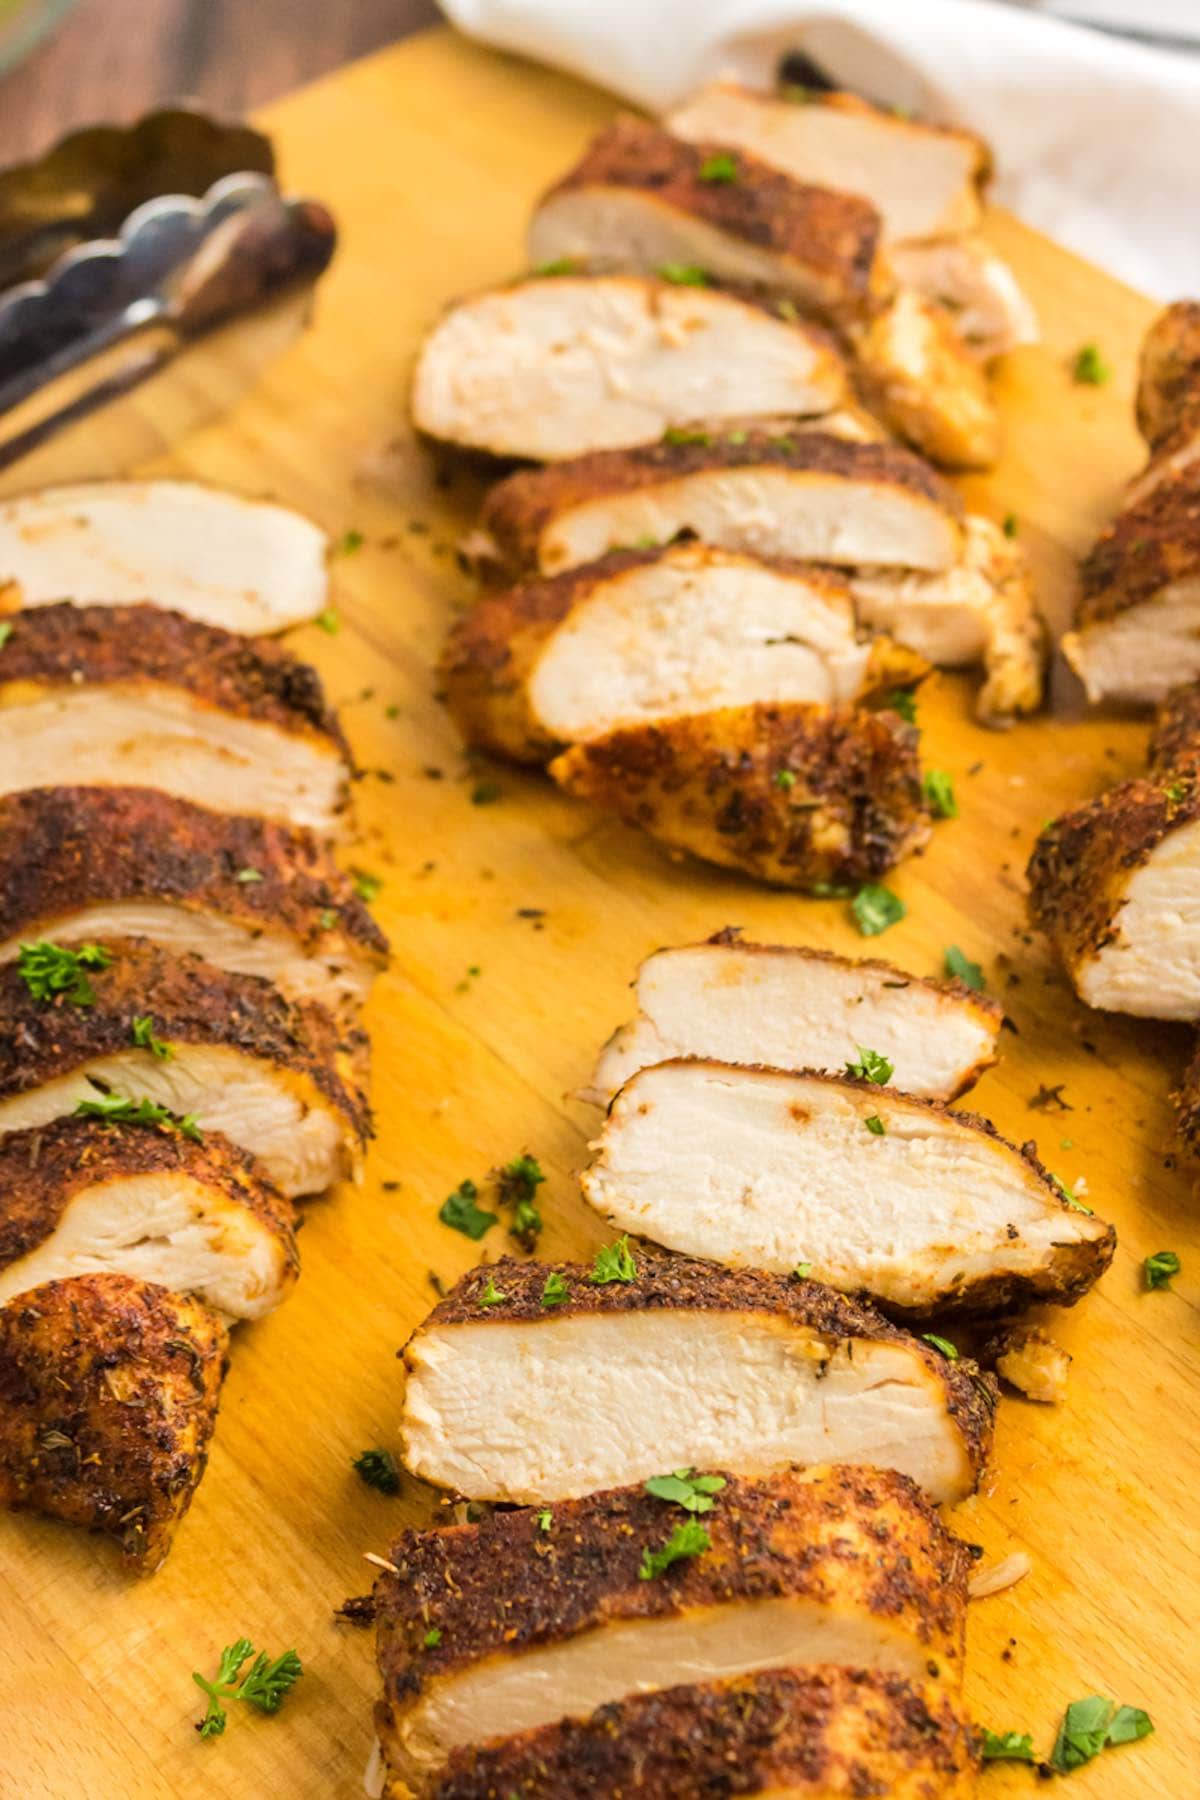
how to grill tilapia.

Step 4: Serve.

Transfer the filets to a serving plate. Garnish with a sprinkle of chopped parsley and fresh lemon, then enjoy!

grilled tilapia recipes.

Tips to make the best recipe

  • Make sure the fish is at room temperature before grilling. To do so, pull the filets from the fridge and let them rest on the kitchen counter for 10 minutes. Skipping this step could lead to unevenly cooked or dried-out fish.
  • The best way to prevent fish from sticking to the grill is to ensure that the grates are hot and well-greased. If your grill doesn’t have a thermometer built into the lid, use a point-and-shoot thermometer or the hand test to help you tell when the grill is preheated to medium-high heat (375°F – 400°F). 
  • Tilapia should be cooked until the internal temperature reaches between 140°F – 145°F. To test for doneness, pierce the thick end of the fish with a fork, then twist gently. If the meat flakes easily and is opaque all the way through, it’s done.

Variations

When it comes to seasoning options, the sky’s the limit. Switch things up with any of these flavors: 

  • Cajun or Creole Seasoning – A smoky and tangy blend that comes with a subtle heat.
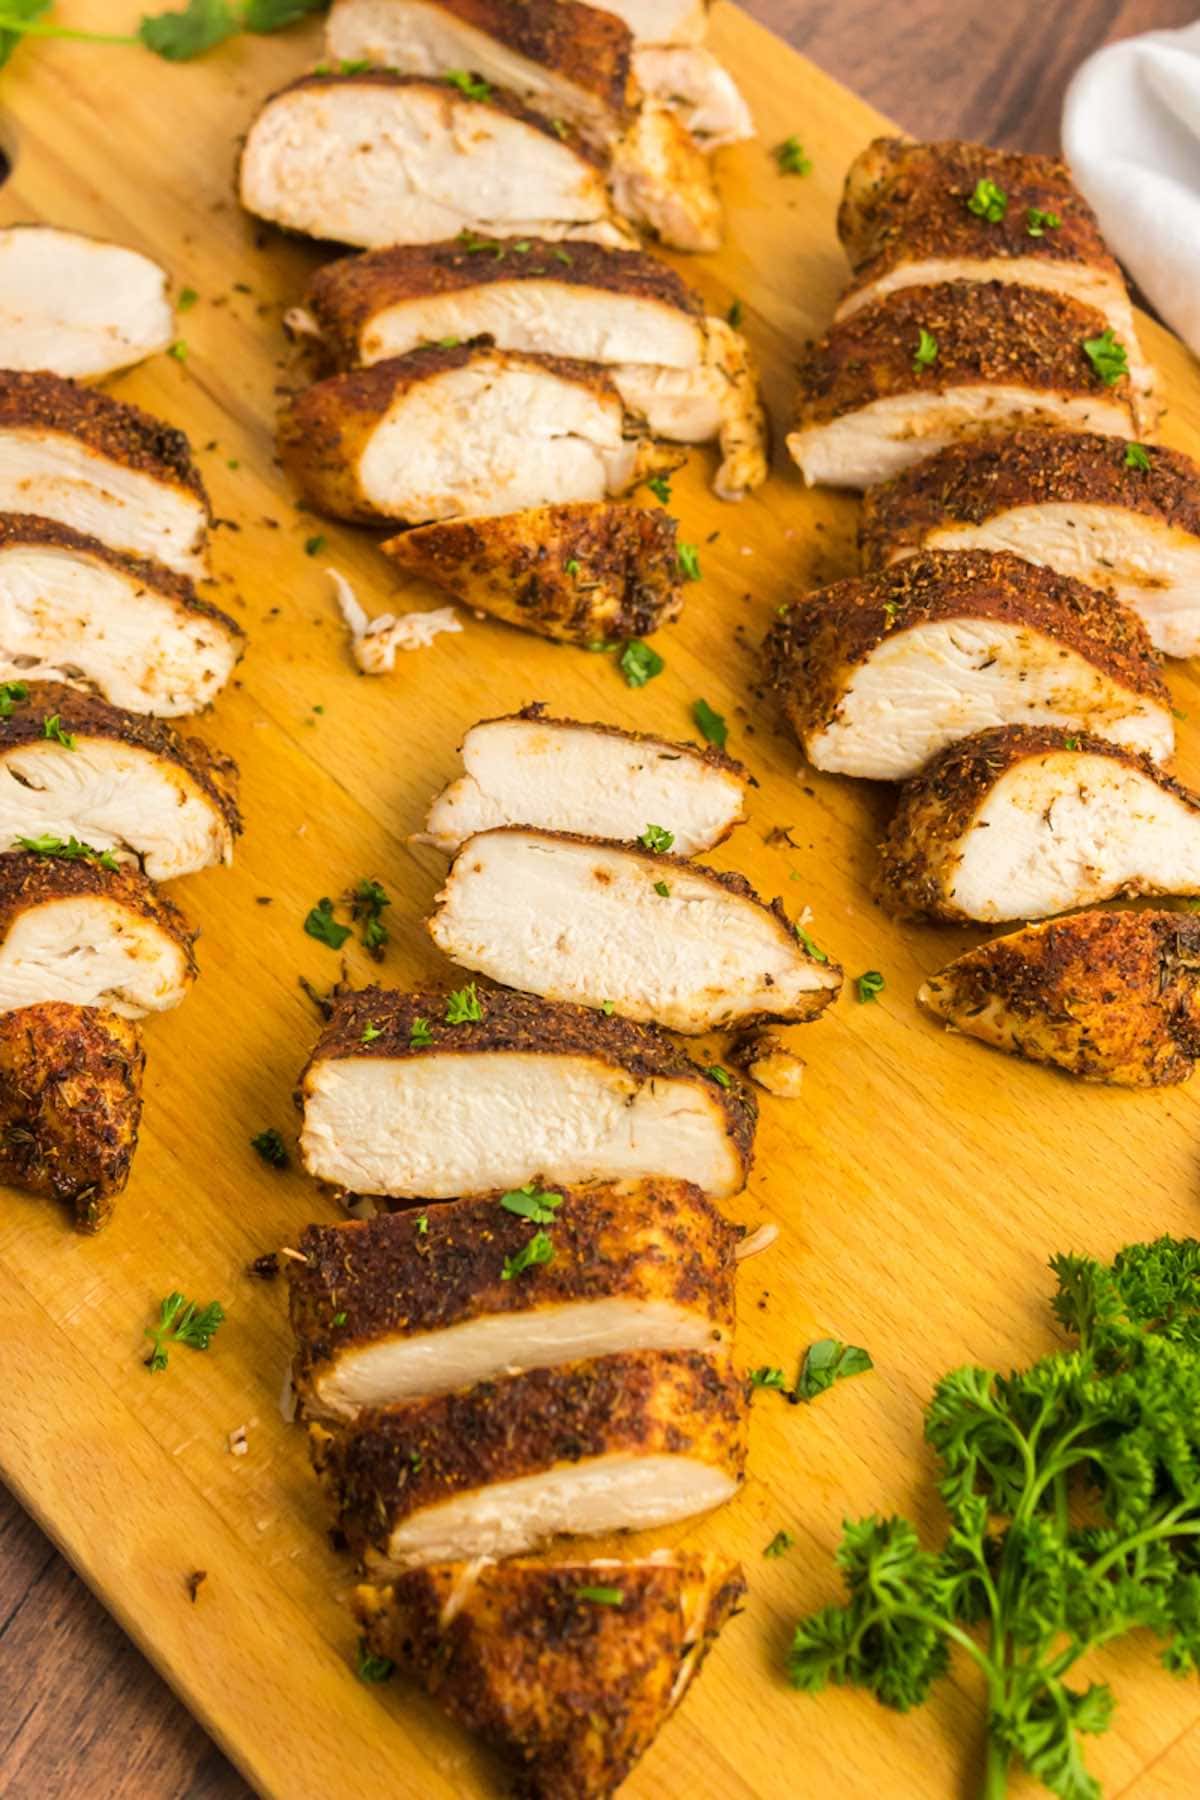
  • Blackened – The spice blend I use for blackened chicken would be great here. 
  • Old Bay – A classic seafood seasoning (like in our seafood boil and its sauce). 
  • Lemon Pepper – To brighten up the flavors even further.
  • Taco/Fajita seasoning – Similar to Cajun seasoning but puts the smokiness on full display.
  • Greek seasoning – To help your fish taste like it’s come straight from the Mediterranean.
  • Teriyaki – Baste the filets in teriyaki sauce before grilling. 

What to serve with this dish

Simple grilled tilapia is best paired with fresh and flavorful vegetable sides. It’s perfect with green salads, asparagus, broccoli, and grilled sweet potatoes

Alternatively, ditch the sides and stuff the grilled tilapia into tortillas for fish tacos! Top with cabbage slaw and spicy mayonnaise, then enjoy.

Storage instructions

  • To store: Once the cooked fish has cooled to room temperature, store it in an airtight container in the fridge for up to 3 days. 
  • To freeze: Keep the cooked and cooled fish in an airtight container in the freezer for up to 2 months.
  • Reheating: To reheat cooked tilapia without drying it out, it’s easiest to cover it and pop it into the microwave for 20 to 30 seconds.
tilapia on grill.

More must-make fish recipes

Frequently asked questions 

How long does it take to grill tilapia filets?

The exact amount of time will depend on the size of the filets. 1-inch thick filets, for instance, shouldn’t need more than 2 to 3 minutes per side. 

Can I grill a whole tilapia fish instead?

Of course! To grill the whole fish, coat it from head to tail in oil, salt, and pepper, then grill it over medium-high heat for 12 to 15 minutes, flipping halfway through. Let rest for 10 minutes before serving. 

Should you grill tilapia in aluminum foil?

No, foil isn’t needed as long as you’re grilling the fish on hot, clean, and oiled grill grates. If you want to grill the filets in foil packets, you can. Just don’t forget to poke holes to allow the steam to escape. 

grilled tilapia recipe.
  • 4 tilapia fillets 4-6 ounces each
  • 2 tablespoons olive oil
  • 1/2 teaspoon salt
  • 1/2 teaspoon pepper
  • Pat down the fish with a paper towel to ensure there is no excess liquid.

  • Generously rub both sides of the fish with olive oil. Sprinkle the salt and pepper.

  • Heat the grill to medium/high and ensure the grill is clean. Brush more oil over the top.

  • Add the fish and cook for 2-3 minutes or until the sides go slightly opaque. Flip the fish and cook for a further 3 minutes.

TO STORE: Once the cooked fish has cooled to room temperature, store it in an airtight container in the fridge for up to 3 days. 
TO FREEZE: Keep the cooked and cooled fish in an airtight container in the freezer for up to 2 months.
TO REHEAT: To reheat cooked tilapia without drying it out, it’s easiest to cover it and pop it into the microwave for 20 to 30 seconds.

Serving: 1serving | Calories: 226kcal | Carbohydrates: 0.2g | Protein: 34g | Fat: 10g | Sodium: 379mg | Potassium: 517mg | Fiber: 0.1g | Vitamin A: 1IU | Calcium: 18mg | Iron: 1mg

Published at Sun, 29 Jan 2023 09:00:00 +0000

Gluten Free Recipes

Posted on

Easy Protein Pancakes

Easy Protein Pancakes

I LOVE PANCAKES!

When I was a little girl, I loved it when we had pancakes for dinner but the pancakes I ate as a child had very little protein in them. Just think about the traditional pancake… it is nothing but sugar and carbs.

Children need more protein than what most are getting. I know I didn’t get enough protein as a child.

Protein is essential for bone health. Most of our bones are built before age 18 and bones need a lot of protein! Yes, protein is key to building healthy bones. Check out THIS study; women with osteoporosis reversed bone loss by increasing protein! Not calcium, protein!

HOW TO MAKE EASY PROTEIN PANCAKES

My easy protein pancakes are not only awesome for all of you, but for your children! If you have children that are picky eaters and do not eat enough protein, make them these protein pancakes! Better yet, have your children make them! Yes, these pancakes are so easy, your children can make them! Kids are more likely to eat something new if they make it!

These easy protein pancakes are only 3 ingredients; eggs, gelatin and Equip protein powder!

What is fun about this pancake recipe is you can make it your favorite flavor! If you love strawberry, use strawberry Equip Prime Protein, if you love chocolate, use chocolate Equip and if you love peanut butter, make peanut butter pancakes with peanut butter Equip!

Equip Prime Protein powder is my favorite protein powder because it is dairy free and it is made from beef which is the most nutrient-dense food! I also love it because it tastes AMAZING! I am addicted to the strawberry!

Equip is so generous, they are offering 15% off when you use code MARIA!

Easy Protein Pancakes

Prep time

Cook time

Total time

Author:

  1. Place all of the ingredients in a mini food processoror blender and combine until very smooth.
  2. Spray a skillet with avocado oil spray and heat over medium high heat. Once hot, pour the batter into the skillet to make 3 inch pancakes (you will get about 8 small pancakes). Cook until golden brown, about 2 minutes, then flip and cook until done, another 1 to 2 minutes. Remove from the skillet and repeat with additional cooking spray and batter.
  3. Top the protein pancakes with sugar free syrup or whatever your heart desires! I love to make breakfast sandwiches with 2 protein pancakes!

Nutritional Information:
217 calories, 10g fat, 27g protein, 2g carbs, 0g fiber
P:E Ratio 2.2

3.4.3177

Jozie and her mom came to my house 5 months ago! Jozie has TS and I am SO proud of her! I had to share her testimony! Doesn’t she look AMAZING???

“Ok, for those looking for my latest Keto updates on Jozie and I here it is…

Jozie went from a women’s small/medium to a children’s size 10. She lost 25lbs.

Her daily battles with blood sugar and feeling unwell are GONE!

Her lymphedema is GONE!

Having to eat every couple of hours is GONE!

Anxiety is almost GONE!

Food worries GONE!

Sugar cravings GONE!

She has more energy, has gotten sick less, is happier, never feels hungry, she grew a couple inches which is HUGE for her TS, and she overall feels GREAT!

I lost 50 pounds! My asthma is non existent, my allergies are non existent, my gallbladder issues are gone, my pancreatitis is not active, my skin is better, my hair is thicker and growing, my headaches are better, my back, neck and aches and pains are better, I have more energy, I sleep better, my mood is better, I’m happier, my digestion is better and in general everything is BETTER!

Before we started Keto I prayed for God to help me accept my weight, be healthier and be a better person mentally and physically to better serve Him or help me lose weight to do those things. He aligned our journey with Keto. All the Glory goes to God for helping me which then completely transformed Jozie’s health and future health!

I am so thankful and feel so blessed the Lord gave us the tools and Maria Wojcik Emmerich and Craig Emmerich to completely change our health and ultimately our lives!” – Linda and Jozie

Most people I consult are doing keto totally wrong. Get fast results with the my Mind-blowing Keto School!

Click HERE to check out my supplement plans!

Published at Wed, 01 Feb 2023 14:00:23 +0000

Breakfast

Posted on

Blackened Chicken

Blackened Chicken

This blackened chicken is a deliciously flavorful way to prepare chicken that takes less than 20 minutes to make! Made with just 5 ingredients and is perfectly juicy every single time. 

blackened chicken.

As a family, we enjoy chicken at least three times a week. 

Family favorites include peanut butter chicken or crispy baked chicken wings. Sometimes I whip out the air fryer to cook some drumsticks or chicken thighs. However, one of my go-to ways to enjoy it is blackened chicken. 

Table of Contents
  1. What is blackened chicken? 
  2. Ingredients needed
  3. How to make blackened chicken 
  4. Tips to make the best recipe
  5. What to serve with this dish?
  6. Storage instructions
  7. More chicken recipes to try
  8. Frequently asked questions
  9. Blackened Chicken Recipe Recipe

What is blackened chicken? 

This recipe involves chicken breast or thighs coated with a spice mix and then seared over high heat. Just like salmon and shrimp, the spice mixture gives the chicken its characteristic look and flavor. 

As we mentioned earlier, it’s a staple in our weeknight dinner rotation and honestly, I reckon it will be part of yours too, because:

  • It needs 5 ingredients. The chicken, some oil, and the seasonings! 
  • Ready in less than 20 minutes. No marinating time is required, so it’s a quick and easy dinner idea
  • Juicy and tender. The spice mix acts like a ‘breading’, keeping the chicken inside extra juicy and tender.
  • It’s healthy and low in carbs. Packed with protein, no carbs, and very little fat, it’s a healthy dinner option. 

What I love about this chicken is just versatile it is! I love using the leftovers in a tortilla, in a sandwich, or shredded and added to a buffalo dip!

Ingredients needed

Although this dish may look incredibly fancy, you actually need very few ingredients to make it. In fact, most of them can easily be found in your pantry. Here is what you’ll need:

For blackened seasoning 

  • Smoked paprika– For the smoky flavor. 
  • Cumin– Adds a lovely umami flavor. 
  • Salt and pepper– To taste.
  • Dried thyme– Improves the texture of blackened chicken. 

For the chicken 

  • Chicken breasts– Skinless and boneless breast fillets.
  • Olive oil– Just a touch to hold all the juices inside. 

How to make blackened chicken 

Calling this recipe simple is being quite generous. The oven takes care of all the hard work so besides seasoning the chicken, there isn’t much to do.

Step 1- Prepare the seasoning

Start by greasing a skillet and preheat the oven. This will reduce the cooking time and make sure the oven is hot enough to cook the chicken quickly. Next, prepare the blackened chicken seasoning mix.

blackened chicken seasoning.

Step 2- season the chicken

Next, add the blackened seasoning mixture and chicken breasts into a bowl. Add the oil then rub the chicken with seasoning to coat them well.  

chicken breasts coated in blackened seasoning.

Step 3- Broil the chicken

Now, put the seasoned chicken in the greased skillet.

Broil for 17 to 19 minutes or until the chicken has an internal temperature of 165F.

blackened chicken breast in cast iron skillet.

Step 4- Rest and serve

Finally, remove the skillet from the oven and allow it to cool for 5 minutes before slicing up and serving. 

blackened chicken breast recipes.

Tips to make the best recipe

  • Use organic chicken breast fillets, as they are free of additives, nitrates, and preservatives. 
  • Let the chicken rest for 5 minutes before serving. This guarantees the chicken in being super juicy. 
  • Adjust the cooking time as per the thickness of the chicken breasts. If they are thinner, you’ll need less time to cook and if they are thicker, keep them for more time in the oven to cook properly. 

What to serve with this dish?

We like to enjoy this chicken as the star protein source and add sides around it. Simple vegetables always work, like brussels sprouts, asparagus, and carrots.

You can also serve it with some heartier sides, like a baked potato, baked sweet potato, or even mac and cheese.

We tend to stick to salads but not the boring kind- those filled with hearty carbs and all the good ingredients.

More salad recipes to try

Storage instructions

  • To Store: Leftovers can be stored in the refrigerator, covered, for up to five days. 
  • To Freeze: Put the leftovers in an airtight container and store it in the freezer for up to 6 months. 
  • Reheating: Either microwave the chicken for 30-40 seconds or reheat in the oven until warm. 

Leftover ideas

Leftover blackened chicken can be used in anything that calls for cooked chicken breasts, including quesadillas, chicken salad, or even over a pizza.

sliced blackened chicken.

More chicken recipes to try

Frequently asked questions

What is the difference between blackened and grilled chicken?

Blackened chicken looks burnt, because of its spice mixture, while grilled chicken has a golden, outer surface. The former also has a distinct spicy and smoky flavor. Grilled chicken, however, can be flavored in a plethora of ways.

Is blackened this the same as Cajun?

Blackened seasoning differs from Cajun seasoning. The former is spicier and has a smoky flavor.

Is blackened food burnt? 

No, blackened chicken isn’t actually burnt (although it looks like it!). The burnt flavor and texture come when the spices sear while cooking blackened chicken. 

Share this recipe on Pinterest

Love this Blackened Chicken recipe?

Share it with the world on Pinterest.

For the blackened seasoning

For the chicken

  • Set the oven to a broil setting and grease a skillet.  

  • In a small bowl, whisk together the blackened seasoning mixture. 

  • Add the chicken breasts to a bowl and cover in the oil. Rub the seasoning over each filet until generously coated. 

  • Place them in the greased skillet and broil for 17-19 minutes, or until the chicken reaches an internal temperature of 165F.

  • Remove from the oven and let sit for five minutes, before slicing up.

TO STORE: Leftovers can be stored in the refrigerator, covered, for up to five days.
TO FREEZE: Put the leftovers in an airtight container and store it in the freezer for up to 6 months. 
TO REHEAT: Either microwave the chicken for 30-40 seconds or reheat in the oven until warm. 

Serving: 1chicken breastCalories: 135kcalCarbohydrates: 1gProtein: 24gFat: 3gSodium: 714mgPotassium: 459mgFiber: 1gVitamin A: 545IUVitamin C: 2mgCalcium: 20mgIron: 1mg

Disclosure: This post may contain affiliate links. I may earn a small commission for my endorsement, recommendation, testimonial, and/or link to any products or services from this website.

Published at Sun, 05 Feb 2023 06:57:12 +0000

Chicken Recipes

Posted on

Candied Nuts

Candied Nuts

These caramelized nuts are sweet, crunchy, and most importantly, guilt-free. They are made in a few minutes with only 5 ingredients. 

caramelized nuts.

Candied nuts are a sweet and crunchy snack that everyone loves. We grew up having tubs of this around the house and we’d often sneak a handful between meals or after dinner for that satisfyingly sweet crunch (much to my mom’s dismay!).

Now, as much as I love the packaged kind, it is loaded with corn syrup, multiple kinds of sugar, and random additives. My candied almonds and pecans are proof that making them at home is easy, so why not make a batch using all kinds of nuts? Oh, and you can also make it without the sugar. 

Table of Contents
  1.  Recipe highlights 
  2. Ingredients needed
  3. How to make candied nuts
  4. Can I bake these?
  5. Tips to make the best caramelized nuts
  6. Storage instructions
  7. More simple snack recipes to try
  8. Frequently asked questions
  9. Candied Nuts (Stovetop or Oven) Recipe

 Recipe highlights 

My mom’s classic recipe with a healthier twist. Come the holiday season, we’d make big batches of them for edible gifts. They also make a fabulous addition in a homemade trail mix.

  • You can make it sugar-free and low-carb. The sugar-free version of these candied nuts is low-carb and perfect for people on a keto diet. 
  • Works for the stove and the oven. This recipe will give your perfectly caramelized nuts whether you use the oven method or in a skillet pan. 
  • You can use any nuts you like. This is a universal recipe that can be used for any nuts of your choice.

Ingredients needed

This recipe calls for a handful of ingredients that are pretty much pantry staples. Here is everything you will need: 

  • Nuts. You can use mixed nuts of your choice. I like using a combination of almonds, cashews, and Brazil nuts. 
  • Allulose or sugar. If you want to keep this recipe sugar-free, use allulose to caramelize the nuts. It provides crispy results without any weird aftertaste. If you don’t mind sugar, use white or brown sugar instead. 
  • Cinnamon. This warm and woody spice is a perfect addition to candied nuts. You can skip it if you want to though I highly recommend that you don’t. 
  • Vanilla extract. Another flavoring agent that provides a richer flavor for the caramelized nuts. 
  • Sea salt. Helps balance the sweetness of the candied nuts.

which sweetener is best?

For glazed nuts, using a sugar substitute that dissolves like sugar is key. While monk fruit sweetener and erythritol are both good in other recipes, they aren’t great for this recipe. Choose allulose, as it dissolves exactly like what sugar.

How to make candied nuts

Caramelizing nuts on the stove is easier and quicker than doing it in the oven. 

Start by placing a heavy-bottomed pan over medium heat. When the pan is hot, add the allulose or sugar along with the cinnamon, sea salt, and water. Mix using a wooden or silicone spatula. Keep stirring until the sweetener melts. 

Once melted, add the nuts and mix until they are fully coated in the sweet mixture. Remove the pan from the heat when the sugar starts to crystalize. 

Now, let the nuts sit for a couple of minutes and give them a stir to get rid of any large clusters. 

glazed nuts.

Can I bake these?

Yes, you can bake these nuts. But you will need to use egg whites to make the nuts caramelize in the oven whether you are using allulose or sugar. Here’s how to candy nuts in the oven. 

  1. Preheat the oven to 250F degrees. 
  2. Whip an egg white with water and add the nuts. Mix to coat the nuts in the egg white mixture. 
  3. Next, toss the nuts in a mixture of allulose (or sugar), salt, and cinnamon. 
  4. Add the nuts to a baking tray lined with parchment paper and bake for an hour or until they are nicely caramelized. Stir the nuts one 1-2 times while they bake. 

Tips to make the best caramelized nuts

  • Cinnamon is not the only spice you can use for glazed nuts. You can also use ground nutmeg, cardamon, and pumpkin spice. If you like candied nuts with a spicy kick, add a pinch of cayenne pepper. 
  • Swap the vanilla extract with maple extract if you enjoy the maple flavor paired with nuts. 
  • Add a splash of bourbon. The alcohol will cook off leaving behind sweet notes of caramel and vanilla. 
  • Wait for the nuts to cool before you break them up and store them away. 

Storage instructions

To store. Place candied nuts in an airtight container for 2 weeks and longer. Keep them in a cool and dry place to prevent the nuts from getting sticky. 

To freeze. Caramelized nuts also freeze well. Put them in a freezer bag, push out the excess air, and freeze for up to 2 months. 

candied nuts.

More simple snack recipes to try

Nuts are super moreish and make a fabulous snack. Here are some other ideas to add to your snack rotation!

Frequently asked questions

Are candied nuts good for you?

Nuts are a source of healthy fats. They are also low in carbs and high in minerals and vitamins. Candied nuts are unhealthy if they are loaded with lots of processed sugar. 
Sugar-free or naturally sweetened candied nuts can be a part of a healthy diet. As overeating candied nuts are easy, keep track of how much you eat. 

Why are my caramelized nuts sticky?

Candied nuts made with sugar remain sticky if you haven’t cooked them long enough. If you are using a sugar-free sweetener, you may need to leave the nuts out to dry for a few hours until they fully harden. 

Should glazed nuts be refrigerated?

You don’t have to refrigerate candied nuts. But if it’s too hot where you live and the caramelized nuts get sticky when left at room temperature, transfer them to an airtight container or bag and store them in the fridge. 

Share this recipe on Pinterest

Love this Candied Nuts recipe?

Share it with the world on Pinterest.

  • Heat a large frying pan or deep pot on medium heat. When hot, add the sugar, salt, cinnamon, and water and mix until fully combined. Allow to heat up, stirring occasionally.

  • When the sugar (or sweetener) has completely melted, add the nuts and mix until fully incorporated. Watch over the pan and continue stirring often until most of the sugar has been coated and beginning to crystallize.

  • Remove pan from the heat and allow to sit for 1-2 minutes. Using a spatula or wooden spoon, stir the nuts once more to avoid overly large clusters and set on a plate or chopping board to cool completely.

For more cluster-sized portions, allow to sit for 10 minutes. TO STORE: Place candied nuts in an airtight container for 2 weeks or longer. Keep them in a cool and dry place to prevent the nuts from getting sticky.  TO FREEZE: Caramelized nuts also freeze well. Put them in a freezer bag, push out the excess air, and freeze for up to 2 months. 

Serving: 1servingCalories: 210kcalCarbohydrates: 20gProtein: 5gFat: 14gSodium: 149mgPotassium: 164mgFiber: 3gVitamin A: 6IUVitamin C: 0.1mgCalcium: 24mgIron: 1mgNET CARBS: 17g

Disclosure: This post may contain affiliate links. I may earn a small commission for my endorsement, recommendation, testimonial, and/or link to any products or services from this website.


Published at Fri, 10 Feb 2023 06:29:45 +0000

Gluten Free Recipes
Posted on

Is Sour Cream Keto Friendly?

Is Sour Cream Keto Friendly?

“This post contains affiliate links, and I will be compensated if you make a purchase after clicking on my links.”

Sour cream is popular for its tart flavor and rich, creamy texture. But is sour cream keto friendly? Continue reading to find out!

Is Sour Cream Keto Friendly
Sea Wave / Shutterstock.com

What Is Sour Cream?

Sour cream is a dairy product that is made from mixing cream with a lactic acid bacteria. The bacteria is responsible for the cream’s thick texture and sour taste.

Other than these two main ingredients, sour cream may also contain other thickening agents or stabilizers such as gelatin or guar gum.

Sour cream is popular in Eastern and Central Europe cuisines where it is used in soups and stews such as Borscht. But when people immigrated to other countries, sour cream became a known ingredients for salad dressings, toppings, dips and even in baked goods such as sponge cakes.

Nutritional Information For Sour Cream

Before we answer the question, “is sour cream keto friendly?”, let’s check its nutritional information.

1 tablespoon (or 12g) of sour cream has 2.3g of total fat and 0.6g of total carbs. It also contains 7.1mg of cholesterol and 12mg of calcium.

Is Sour Cream Keto Friendly?

Yes, full-fat (regular) sour cream is keto friendly. However, other options such as low-fat and non-fat are not. Because these two contains less fat and higher carbs.

Furthermore, there are a lot of sour cream brands out there, but not all of them are keto friendly. So, it’s best to look at nutritional labels before purchasing sour cream.

Closeup Of A Bowl Of Tasty Sour Cream On A Wooden Table
Pixel-Shot / Shutterstock.com

Where To Get Sour Cream

You can either make your own sour cream or try these keto friendly brands from Amazon:

Published at Thu, 09 Feb 2023 15:56:00 +0000

Is It Keto Friendly?

Posted on

Healthy Valentine’s Day Gift

Healthy Valentine’s Day Gift

Valentine’s Day is coming!

Say what you will about Valentine’s Day, but I do love making it special. I get healthy gifts for all of my boys to make it special. It is a day for love and I like to show my boys how much I love them.

HEALTHY GIFTS THAT “KEEP ON GIVING”

I love gifting the “Gift that Keeps Giving the All Year Long” as cousin Eddie would say!  And a sauna blanket is the perfect gift to give to your loved one! Not only because every time they use it, they will think of your generosity, but you most likely will be able to use the sauna blanket and get the benefits too! It is really great for the whole family.

There are so many health benefits to saunas! This gift is a great way to jump start your health goals! Here are some of the great benefits you can get from saunas:

  1. Relaxing. They are great for reducing stress. And have been shown to improve sleep too!
  2. Increase Blood Flow
  3. Soothe Aches and Pains
  4. Recover from Exercise. And alternating between sauna and then cold soak can be great for recovery and healing.
  5. Keep a Cool Head. Many people struggle to stay in a sauna long enough to get some of the great health benefits because their head will get too hot. But with a sauna blanket, your head stays cool making it easier for many people to stay in it longer.

And to add to all these great benefits, a sauna blanket (versus a traditional sauna) adds these great conveniences:

  1. Much More Affordable than traditional saunas (about 1/3 to 1/4 the price)
  2. Much Less Space (can be folded up and kept in a closet)
  3. Portable Too!

WHERE TO GET A SAUNA BLANKET

We do not have a lot of space at our Keto Condo in Maui so a sauna blanket was perfect for getting all the benefits without taking up space!

What I love about Bon Charge is their constant searching for creating products that really can enhance our health and wellness! BON CHARGE products help you naturally address the issues of our modern-day way of life effortlessly and with maximum impact.

Bon Charge is so generous when you use code MARIA, you get 20% OFF! That saves you $140!

Published at Sat, 11 Feb 2023 08:13:47 +0000

Coupon Codes for Products I Love

Posted on

Zero Carb Mozzarella Sticks

Zero Carb Mozzarella Sticks

If you haven’t noticed, I do not allow advertising on my site.

I just didn’t agree with some of the products that were advertised. They were keto products, but they were unhealthy and I would never personally eat most of the products. It was hard to say no to blog advertisements; they pay thousands of dollars a month, but I just felt uncomfortable about having the products I didn’t recommend on my website.

Instead, I have created a shopping list where you can find all the healthy ingredients that are difficult to find in the grocery store (and if you do find them, they are often very expensive).

I have done a lot of detective work and found the lowest prices on for all of the products I use and love. Everything from food, pantry items, kitchen tools, supplements, and skin products are on my list.

I rarely waste time in the grocery store because I find everything online for a way better price!

All you have to do is click on the words in my recipes and it will take you right to the correct item. If you add them to your cart I get a tiny commission that helps me afford to keep practicing recipes (Recipe experimenting can costing me a fortune!…but I love helping!).

I also have GREAT HOLIDAY GIFT IDEAS on the list!

Happy Shopping and THANK YOU for all your support!!!

Zero Carb Mozzarella Sticks

Prep time

Cook time

Total time

Author:

  1. Preheat the oven or an air fryer to 400°F.
  2. Place the ground beef in a large bowl and season with the salt. Use your hands to combine well. Divide the beef into 8 equal portions and form each portion into a ¼-inch-thick rectangle, about 3½ inches by 2 inches.
  3. Place one string cheese in the center of a patty. Use your fingers to seal the patty around the cheese; be sure to seal the edges well or the cheese will melt out. Repeat with the remaining patties and cheese. Wrap a slice of bacon around the entire patty, then secure the ends of the bacon with toothpicks. Repeat with the remaining patties and pieces of bacon.
  4. Place the wrapped patties on a rimmed baking sheet lined with parchment paper if using the oven or in the air fryer basket in a single layer if using an air fryer and bake or cook for about 8 minutes, flipping after 4 minutes, until the bacon is cooked to your liking.
  5. Remove the mozzarella sticks from the oven or air fryer and let cool for a few minutes before consuming or the melted cheese will burn your mouth.
  6. Store in an airtight container in the refrigerator for up to 4 days. To reheat, place in a preheated 400°F oven or air fryer for about 3 minutes, or until heated through.

Calories: 274 Fat: 20 g Protein: 24 g Carbs: 0 g

3.4.3177


“Hi Maria and Craig,

I just wanted to update you on our success! I am the one that asked if you would add two seats so I could bring my daughter to your PSMF class at your home.

Jozie is 12 and has Turners Syndrome and weight issues and eating has been a struggle her entire life. Guess what?! She is successful and loves this way of eating! She is experiencing being full and I always said “she doesn’t have a full switch”!

Also, she is on shots daily for growth for her TS and hadn’t been growing well even with them. Well, during the last 44 days she grew an inch and she lost 10lbs!!

The supplements from your personal health assessment and your way of Keto has been nothing but amazing! We didn’t care about the weight loss but figured some would happen. Her self esteem, her confidence, and her success in committing to this lifestyle is just giving her so much! Thank you, thank you, thank you I have been doing it side by side with her so we could be a team and the benefits I am seeing are also nothing short of amazing. I have lost 17lbs and still going.

Most importantly for me I am hanging on to my gallbladder and seeing so many other health improvements! Like my allergies are even non-existent since I converted – who knew?!

Thank you for going out of your way to add two seats that day…you literally changed our lives in ways I can’t put all in to words.” – Linda 

Most people I consult are doing keto totally wrong. Get fast results with the my Mind-blowing Keto School!

Click HERE to check out my supplement plans!

Published at Wed, 15 Feb 2023 08:36:39 +0000

Appetizer and Sides

Posted on

Is Avocado Oil Keto Friendly?

Is Avocado Oil Keto Friendly?

“This post contains affiliate links, and I will be compensated if you make a purchase after clicking on my links.”

Avocado oil is a nutritious and easy to use oil. And a lot of people on keto are curious, “is avocado oil keto friendly?”. Continue reading below to find out!

Is Avocado Oil Keto Friendly
Gayvoronskaya_Yana / Shutterstock.com

What Is Avocado Oil?

Avocado oil is an edible and cosmetic oil extracted from the pulp of the fruit. As an edible oil, it is considered to be the safest for high-heat cooking because of its high smoke point. And it actually has a higher smoke point than olive oil.

Other than that, it can also be used for drizzling vegetables, marinating meat and even baking.

Nutritional Information For Avocado Oil

Let us check avocado oil’s nutritional information before answering the question, “is avocado oil keto friendly?”.

1 tablespoon of avocado oil contains 124 calories, 14g of total fat and no carbs.

Is Avocado Oil Keto Friendly?

Yes, avocado oil is keto friendly. It is high in healthy fats and has no carbs. As a matter of fact, it’s an excellent oil for keto as long as it is extra virgin, expeller and cold pressed or organic.

There are a lot of avocado oil brands out there. And thankfully, most of them are unrefined and are extracted using natural methods.

Avocado And Avocado Oil On A Wooden Background
Premsinee1987 / Shutterstock.com

Where To Get Avocado Oil

A lot of avocado oil brands are available on Amazon. Here are our best picks:

Published at Fri, 17 Feb 2023 18:01:00 +0000

Is It Keto Friendly?